I have been struggling to find a solution for a common use case. I want a tool for global thematic webmapping that:
- Complies with the UN Geospatial Information Section’s policy on displaying national borders and disputed territories
- Looks good and performs well for highlighting country areas for display on a global scale
- Shows small island states without having to zoom
- Can be displayed in a projection appropriate for global thematic maps (e.g. Robinson)
- Can be used to create dashboards on BI platforms like Tableau
I finally found a good candidate, and I want to share so that others can use it as well. Creating this layer involves an interesting exercise in QGIS, Mapbox, and Tableau. You can read more about that below, or skip it and download this Tableau worksheet to incorporate it into your own dashboards or reproduce by yourself.
Here is an example of a dashboard that uses the map:

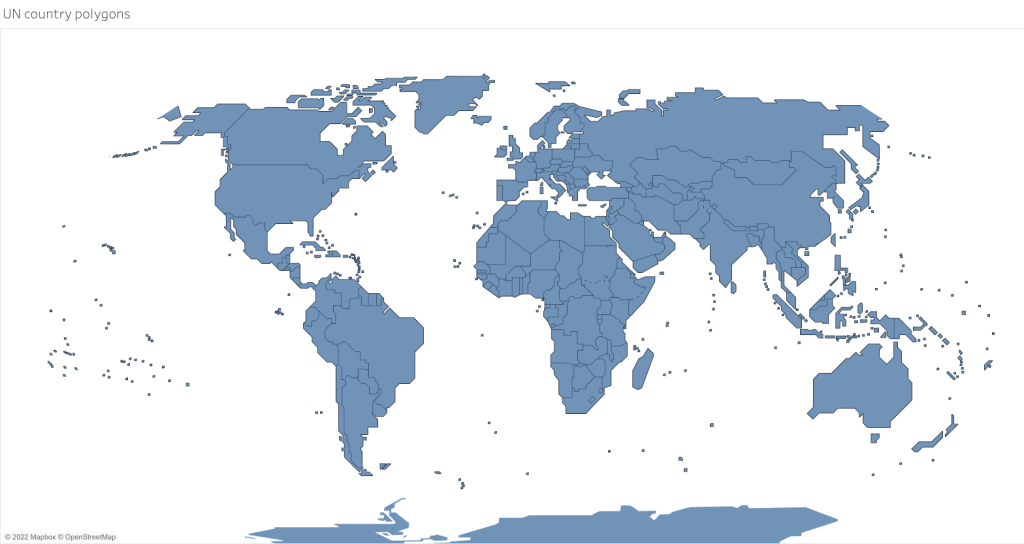
The first stop was finding the right vector map layer. Fortunately, the UN Geospatial Information Section recently published the “cartotile” layer, which uses a stylized design and renders all the country borders and disputed territories in the UN approved manner. It displays small island states as squares which are clearly visible even at maximum zoom. If you’re building your own site and are comfortable using Mapbox-GL-JS then your solution is here.
But I wanted something I could use in Tableau. I got my hands on the geojson files for this layer (including country polygons and borders). Simply importing into Tableau would not work because the map would be displayed in Web Mercator (Tableau automatically converts all geographic layers to Web Mercator.) rather in than the Robinson projection I wanted. The Mercator projection is not a good choice for global thematic maps because the area distortion at the high latitudes is too great. And Tableau is not able to do other map projections.
Enter this clever workaround developed by Sarah Battersby. The ideas is to create your map in the Robinson projection (or whatever one you want) but trick Tableau into thinking it’s projected in Web Mercator. Obviously this will not work if you have other geographic data you want to overlay in Tableau because the country polygons will not be shown in correct geographic space. But for our purposes of highlighting country areas it will work just fine.
You can use QGIS to reproject the layer and then alter the layer properties to trick Tableau by changing the coordinate system to Web Mercator. Enjoy the invigorating feeling you get from committing this spatial transgression!
You can then upload this layer into Tableau and join it with your country data. But there is one more step for the full solution. Recall that our UN map has a layer with borders, including some dashed lines. To add the borders we need to create a base map. To do this, use the same trick in QGIS with the borders layer, and then save it and create and style a tileset in Mapbox using the altered layer. Finally this Mapbox map can be added as a background map in Tableau. It’s all explained by Sarah in another detailed post.
There are other options for making a webmap in projections that are not Web Mercator. Flourish’s Projection Map template works very well, and you don’t have to mess with the above workaround. It changes the projection for you. You can also use Carto, as in this example. A really interesting development is Adaptive Projections from Mapbox. With this tool the map projection changes as the user zooms, so that zoomed-out views appear in a projection applicable for global viewing (e.g. Robinson), but zoomed-in views appear in Mercator to avoid distortion. It’s a pretty cool technical achievement.
Please let me know if you know of any other solutions or ideas for this type of mapping.